Are you tired of seeing your furry friend roam freely around the yard? Creating a safe and secure outdoor space is a top priority for many pet owners.
Building a fence can be expensive, but it doesn’t have to be. By repurposing recycled materials, you can create a sturdy barrier. This keeps your pet safe and your garden secure, all while being budget-friendly.
With a little creativity and some basic DIY skills, you can build a functional and eco-friendly fence. This cost-effective solution is perfect for those looking to save money without compromising on quality.
Key Takeaways
- Create a safe outdoor space for your pet
- Repurpose recycled materials to save money
- Build a sturdy and eco-friendly fence
- Keep your pet secure and your garden protected
- DIY project that’s easy on the budget
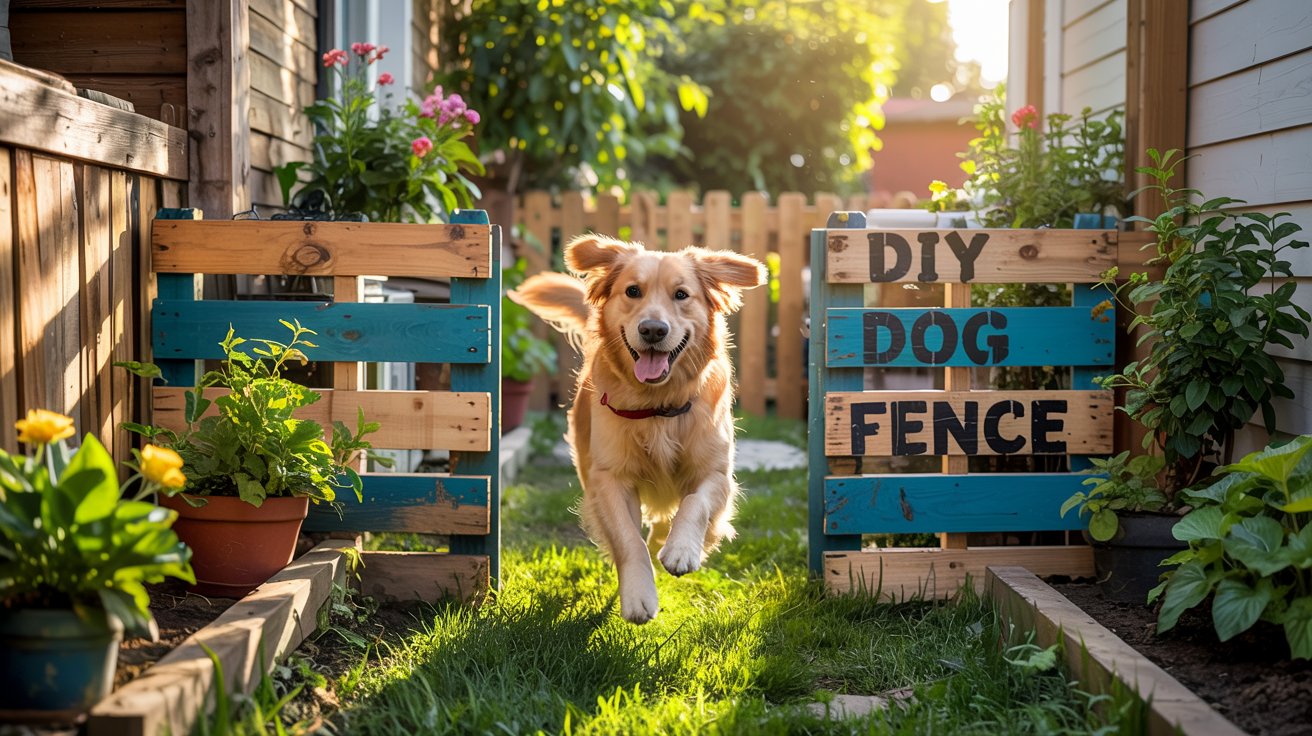
The Benefits of Building a Pallet Dog Fence
Building a DIY pallet fence for your dog is both budget-friendly and eco-friendly. It’s a great choice for dog owners who want a low cost dog fence idea.
Cost-Effectiveness of Using Recycled Materials
Using recycled pallets for your dog fence saves a lot of money. Pallets are often free or very cheap, perfect for DIY projects. This way, you avoid spending a lot on traditional fencing materials.
| Material | Cost |
|---|---|
| Pallets | $0 – $10 |
| Traditional Fencing Materials | $50 – $100 |
| Labor | $0 (DIY) |
The table shows how using pallets is cheaper. Not only are the materials low-cost, but you also save on labor by doing it yourself.
Environmental Impact and Sustainability
Pallet fencing is not just cheap; it’s also good for the environment. Reusing pallets cuts down on waste that would go to landfills. It’s a green choice for dog owners who want a DIY pallet fence for dogs.
Choosing a pallet dog fence means you’re picking a cost-effective and sustainable option. It’s good for your wallet and the planet.
What You’ll Need: Materials List
Before starting your homemade dog fence, gather all needed materials. You can make a useful and nice-looking fence without spending a lot.
Finding Free or Low-Cost Pallets
Pallets are key for this project. You can find them for free or cheap. Look at local grocery stores, home improvement stores, and Ace Hardware. We found pallets for just $1 each, making your fence affordable.
Make sure to check the pallets for damage or chemicals before taking them.
Additional Materials Required
You’ll need more than just pallets for your fence. These include:
Fasteners and Hardware
You’ll need wire, nails, or screws to hold the pallets together and to the posts. The fastener type depends on your fence design and materials.
Optional Enhancement Materials
To enhance your fence, use weather-resistant wood sealants or paint to protect the pallets. You can also add post caps or trellises for a nicer look.
Budget Breakdown
Here’s a rough cost breakdown. If you find pallets for $1 each, other materials like fasteners will vary. For a basic pallet dog fence, expect to spend $30-$50. This makes it a budget-friendly option for pet owners.
Essential Tools for Your Pallet Dog Fence Project
To make your creative dog fence with pallets a reality, you need the right tools. Repurposing pallets requires creativity and the right equipment. The right tools make the job easier and ensure your fence is sturdy and safe for your pet.
Must-Have Tools
You’ll need a power drill or hammer, a saw, and a measuring tape for your project. A post-hole digger is key for making holes for the fence posts. A shovel helps with digging and leveling the ground.
A level tool keeps your fence posts straight. String and stakes mark the fence line. These tools are essential for a successful project.
| Tool | Purpose |
|---|---|
| Power Drill/Hammer | Driving nails or screws |
| Saw | Cutting pallets to size |
| Measuring Tape | Ensuring accurate measurements |
| Post-Hole Digger | Creating holes for fence posts |
Optional Tools That Make the Job Easier
While must-have tools are crucial, optional tools can make things easier. A circular saw cuts more efficiently, and a wrench tightens loose parts. Sandpaper smooths out rough edges.
Using these tools can improve the quality and look of your creative dog fence with pallets.
Safety Considerations Before You Begin
Before you start building your pallet dog fence, safety is key. It’s important to make sure you and your pets are safe. This will help your easy DIY dog fence project go smoothly.
Personal Safety Equipment
Wearing the right gear is crucial when working with pallets. Gloves protect your hands from splinters. Safety glasses keep your eyes safe from flying debris. A dust mask also helps prevent breathing in dust and particles.
- Gloves for hand protection
- Safety glasses for eye protection
- Dust mask for respiratory protection
Pet Safety Considerations
Keeping your pets safe is also important. Make sure your work area is secure. Keep your pets away to avoid accidents. Always check the pallets for chemicals before using them.
Selecting and Preparing Your Pallets
Before starting your pallet dog fence, pick pallets that are safe and strong. This step is key to making sure your affordable DIY pet fence solution is both cheap and safe for your pets.
How to Identify Safe Pallets for Pet Projects
Not all pallets are safe for pets. You must check them carefully to avoid dangers.
Avoiding Chemically Treated Pallets
Chemically treated pallets can harm your pets. Look for “HT” (Heat Treated) pallets instead of “CT” (Chemically Treated). Heat-treated pallets are safer because they’re treated with heat, not chemicals.
Checking for Structural Integrity
Check the pallets for damage or weakness. Look for broken or loose boards. Make sure the pallet is strong enough to be a fence panel. A strong pallet will make a safer and more durable fence.
Cleaning and Sanitizing Pallets
After picking your pallets, clean and sanitize them. This removes dirt, debris, and contaminants. Use a power washer or a stiff brush with soap and water. Let them dry before you start.
Disassembling vs. Using Whole Pallets
You can use pallets whole or take them apart for custom panels. Using whole pallets saves time, but taking them apart lets you design more freely. Think about your needs and yard layout when deciding.
| Pallet Condition | Action Required | Outcome |
|---|---|---|
| Chemically Treated | Discard | Safety Ensured |
| Damaged or Weak | Repair or Discard | Structural Integrity Maintained |
| Clean and Sturdy | Clean and Sanitize | Ready for Use |
Planning Your Pallet Dog Fence DIY Project
To build a functional and attractive pallet dog fence, careful planning is crucial. This involves several key steps that will ensure your DIY project is successful and meets your needs.
Measuring Your Yard Space
Accurate measurements are vital to determine the length of your fence and the number of pallets required. Measure the perimeter of the area where you plan to install the fence, taking into account any obstacles or corners. Use a tape measure to get precise dimensions, and consider sketching a basic diagram to visualize your project. This step will help you estimate the materials needed and avoid unnecessary expenses.
Determining Fence Height Based on Dog Size and Jumping Ability
The height of your pallet dog fence depends on the size and jumping ability of your dog. For smaller breeds, a fence height of 3-4 feet may suffice, while larger or more agile dogs may require taller fences. Consider your dog’s ability to jump and plan accordingly to ensure their safety. As
“A fence is only as good as its ability to keep your pet safe and secure.”
- Small dogs: 3-4 feet
- Medium dogs: 4-5 feet
- Large dogs: 5-6 feet or more
Creating a Simple Layout Plan
With your measurements and fence height determined, create a simple layout plan. This can be as straightforward as marking the fence line with stakes and twine or using a digital tool to visualize the layout. Your plan should account for gate placement, corners, and any sections that may require additional support. By having a clear plan, you’ll be able to execute your pallet dog fence DIY project efficiently and effectively, ensuring a safe and enjoyable space for your pet.
Preparing the Fence Area
Getting the fence area ready is key to a durable and long-lasting cheap dog fence project. Before you start building your DIY pallet fence for dogs, make sure to clear and level the ground. This is crucial for the fence’s stability and longevity.
Clearing and Leveling the Ground
Begin by removing any debris, plants, or obstacles from the fence area. This step ensures a clean start and avoids future problems. Use a rake or shovel to clear the ground and then check for any uneven spots. Leveling the ground is crucial for a straight and stable fence.
To level the ground, use a spirit level and a trowel or shovel. If the ground is very uneven, you might need to add fill dirt to make it even.
Marking Post Locations
After clearing and leveling, mark where the fence posts will go. Measure the area and use stakes, twine, or a garden hose to mark the fence line. Spacing between posts is typically around 6-8 feet. However, this can change based on your pallet size and fence design.
| Task | Description | Tools Needed |
|---|---|---|
| Clearing | Remove debris and vegetation | Rake, shovel |
| Leveling | Ensure the ground is even | Spirit level, trowel, shovel |
| Marking Post Locations | Identify where fence posts will go | Stakes, twine, measuring tape |
By following these steps, you’re on your way to a safe and effective DIY pallet fence for dogs. It will give your pet a secure outdoor space.
Setting Up Fence Posts
Setting up fence posts is key to a strong and safe dog fence on a budget. These posts support and structure your pallet dog fence. They make sure it’s durable and safe for your pet.
Options for Fence Posts on a Budget
There are affordable options for fence posts. You can use repurposed wood or metal T-posts.
Repurposed Wood Posts
Repurposed wood posts are eco-friendly and cheap. Look for old wooden posts at local stores, online, or reuse old fencing. Check them for damage or rot first.
Metal T-Posts Alternative
Metal T-posts are a good choice for fence posts. They’re durable, easy to install, and not too expensive. You can drive them into the ground with a sledgehammer or post driver.
Installing Posts Securely
It’s important to install posts securely for a stable fence. Dig holes that are a third of the post’s height. Then, fill with concrete to anchor the post. For extra stability, use gravel or sand around the base.
| Post Type | Cost | Durability |
|---|---|---|
| Repurposed Wood Posts | $5-$10 | Medium |
| Metal T-Posts | $10-$20 | High |
Ensuring Posts Are Level and Aligned
To keep your fence straight and level, use a spirit level and string line. This is important for your fence’s structure. Adjust the posts as needed for perfect alignment.

By following these steps, you can build a strong and safe pallet dog fence. For our project, we used one post (2×4) every other pallet on the short side. On the long side, we used one post per pallet. This kept costs under $50.
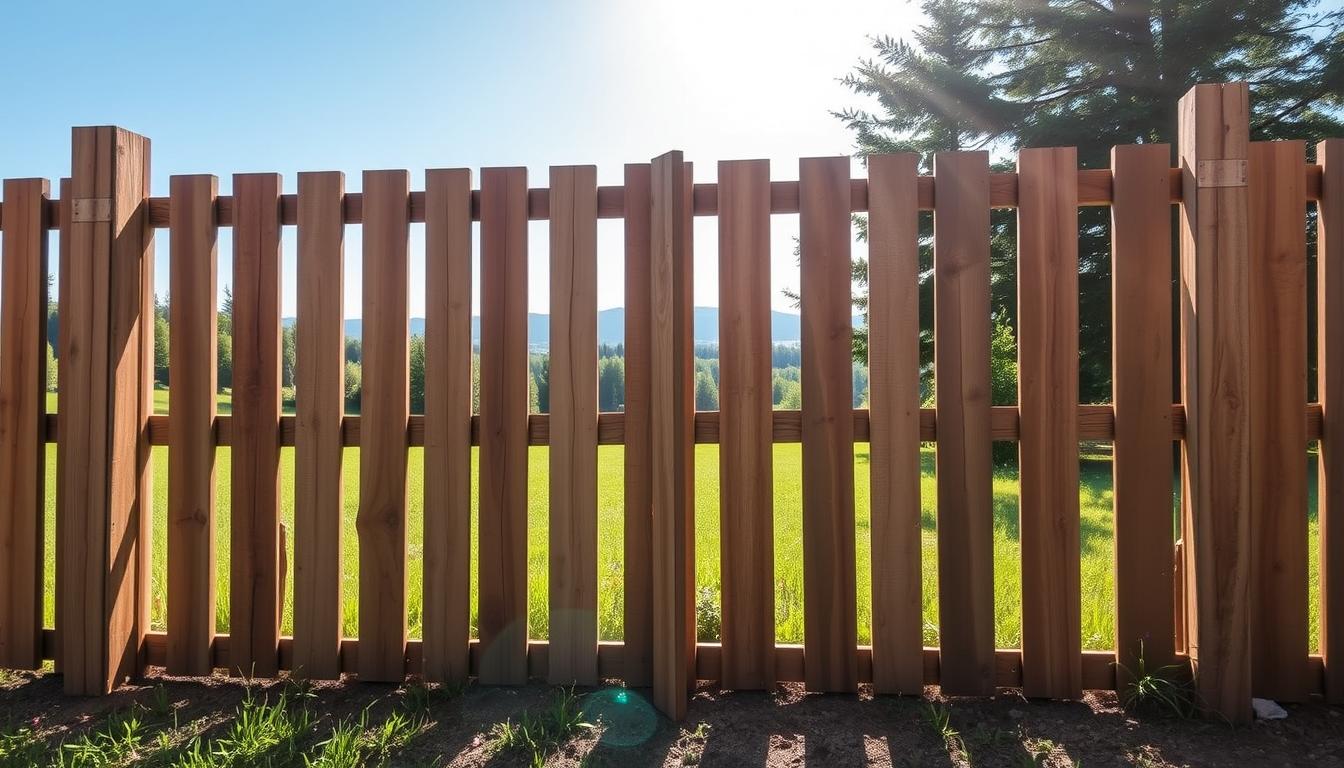
Step-by-Step Pallet Dog Fence DIY Instructions
Building a pallet dog fence is easy and safe for your dog. This guide will show you how to prepare pallets and secure them in place.
Preparing Pallets for Installation
Start by checking your pallets for damage or rot. Throw away any that are broken or unsafe. Then, clean the pallets well to remove dirt and chemicals.
Scrub with a wire brush and rinse with water. Let them dry completely before you start. This makes your fence sturdy and safe for your pet.
Horizontal vs. Vertical Pallet Placement
You can place pallets either horizontally or vertically. Horizontal looks traditional and is easier to install. Vertical adds a unique look and works well with disassembled pallets.
Think about your dog’s size and jumping ability when choosing. Also, consider what you prefer.
| Pallet Placement | Advantages | Disadvantages |
|---|---|---|
| Horizontal | Easier installation, traditional look | May require more pallets |
| Vertical | Unique aesthetic, potentially fewer pallets needed | More challenging installation |
Securing Pallets to Posts
Hold the pallet against the post and check if it’s level. You might need to adjust the ground. Once level, dig a hole and screw the pallet to the post.
Make sure the pallets are tight to avoid gaps. Check the fence often to keep it safe and sturdy.
By following these steps, you can make a creative dog fence with pallets. It’s a easy DIY dog fence option that’s safe and looks good. It also saves you money.
Connecting Fence Sections Securely
To keep your dog fence strong, it’s key to connect the sections well. An affordable DIY pet fence solution needs a solid structure. This means joining the sections tightly.
Methods for Joining Pallets Together
Using 2 x 2 joiners is a great way to link pallets. It makes a sturdy fence line. This method keeps the pallets close, so your dog can’t slip through.
Reinforcing Corner Sections
Corner sections are weak spots. To make them stronger, add support posts or angle brackets. This keeps the pallets in place.
Creating Uniform Fence Height
Having a uniform fence height looks good and keeps your dog in. Measure your pallets and adjust them to keep the fence level.
| Method | Description | Benefits |
|---|---|---|
| Using 2 x 2 Joiners | Bond pallets together for a cohesive fence line | Strong, minimizes gaps |
| Reinforcing Corners | Use additional support posts or angle brackets | Enhances stability, prevents weaknesses |
| Uniform Fence Height | Measure and adjust pallets for consistent height | Aesthetically pleasing, prevents jumping |
Building a Functional Gate for Your Cheap Dog Fence Project
Now that you’ve built the main parts of your pallet dog fence, it’s time to make a gate. A good gate is key for your fence’s safety and function. You’ve built the fence, and now you need a gate that’s strong and easy to use.
Designing a Simple Pallet Gate
Think about the gate’s size and material. It should be big enough for easy access but not too big. Use the same pallets for the gate as you did for the fence. First, pick the gate’s size based on the fence’s gap.
To build the gate, follow these steps:
- Choose two strong pallets for the gate’s base.
- Break down the pallets into planks and make a gate frame.
- Make sure the frame is strong to hold the gate’s weight.
Installing Hinges and Latches
After making the gate, add hinges and a latch. Hinges let the gate swing, and the latch keeps it shut. Pick sturdy hinges for the gate’s weight.
| Hardware | Description | Quantity |
|---|---|---|
| Hinges | Sturdy metal hinges for gate support | 2-3 |
| Latch | Secure latch for gate closure | 1 |
| Screws | For attaching hinges and latch | As needed |
Ensuring Proper Gate Operation
Test your gate to make sure it works well. It should open and close smoothly. If it doesn’t, adjust the hinges or add support.
By following these steps, you can make a working gate for your pallet dog fence. This will finish your cheap dog fence project and keep your dog safe.
Reinforcing Your Dog Fence for Safety
A reinforced fence is more than a barrier; it’s a safety net for your pet. After building your DIY pallet fence, making it stronger keeps your dog safe. A sturdy fence stops escapes and injuries.
![]()
Addressing Weak Points
Look for weak spots in your fence, like loose pallets or shaky posts. Fixing these weak points is key to keep your dog safe. If your dog digs, make sure the fence’s bottom is extra secure.
To fix weak spots, add wire or screws to hold pallets together. Regular checks can spot problems early.
Adding Support for Durability
Adding support makes your fence last longer. You can put in more posts or strengthen them with concrete. Using recycled materials saves money and is good for the planet. Old wooden planks or metal rods can be great for support.
Preventing Digging Under the Fence
Stop dogs from digging under the fence. Bury the fence a bit or use wire mesh. This stops escapes and keeps out unwanted visitors. A good fence keeps your pet and neighbors safe.
By strengthening your dog fence, you keep your pet safe and the fence durable. Regular care and checks will make it last longer. This creates a safe space for your dog to play.
Weatherproofing and Finishing Touches
To keep your DIY dog fence lasting, weatherproofing and finishing are key. After building a homemade dog fence on a budget, it’s important to protect it from the weather.
Weatherproofing makes your fence last longer and keeps your pet safe. It stops splinters and harmful chemicals from getting in.
Sanding Rough Edges for Safety
Start by sanding down any rough edges on your pallet dog fence. This makes it safer for your pets by removing splinters and sharp points. It also makes your creative dog fence with pallets look better.
- Use a medium-grit sandpaper to smooth out the wood.
- Focus on areas where pallets have been cut or disassembled.
- Sanding also gets the surface ready for any treatments you’ll apply.
Applying Pet-Safe Sealants or Paint
After sanding, think about using a pet-safe sealant or paint. This protects the wood from moisture and UV damage. It’s a crucial step for your fence’s long life.
Choose a sealant or paint that’s safe for your pets. Natural oils and water-based paints are good options.
Decorative Touches on a Budget
Finally, add some decorative touches to your pallet dog fence without spending a lot. You could add plants or flowers around the fence. Or hang decorative items from the pallets.
These touches make your fence look better and fit in with your yard’s style.
Weatherproofing and Finishing Touches
After building your budget-friendly pallet dog fence, focus on making it weatherproof and adding a personal touch. Weatherproofing extends the fence’s life and keeps it safe for your pet.
Sanding Rough Edges for Safety
Sanding rough edges is key to preventing injuries to your pet. Rough wood can cause splinters. Smooth out any harsh edges or surfaces. This simple step boosts your pet’s safety in the fenced area.
Applying Pet-Safe Sealants or Paint
Applying a pet-safe sealant or paint protects the wood from moisture and UV damage. Choose a non-toxic finish for your pet’s safety. Consider using natural oils or water-based paints that are safe for pets and the environment.
Decorative Touches on a Budget
Adding decorative touches can make your homemade dog fence look better. Think about adding plants or flowers around the fence. Or, attach decorative items to the pallets. This beautifies your yard and makes it welcoming for your pet.
By following these steps, you can make a durable, safe, and attractive dog fence on a budget. Your pet will love the extra effort you put into making their outdoor space comfy and fun.
Maintenance Tips for Long-Lasting Results
Keeping your DIY pet fence in good shape is key. Regular care makes your pallet dog fence last longer. It also keeps your pet safe and secure.
Seasonal Maintenance Schedule
Follow a seasonal maintenance plan to keep your fence in top shape:
- Spring: Check for winter damage and fix it.
- Summer: Look for wear and tear. Use a pet-safe sealant to protect the wood.
- Fall: Remove leaves and debris to prevent rot and damage.
- Winter: Make sure the fence can handle snow and ice.
Quick Repairs for Common Issues
Fixing problems quickly stops them from getting worse. Here are some quick fixes for common issues:
- Loose Boards: Use nails or screws to secure loose boards.
- Damaged Posts: Replace any damaged posts to keep the fence strong.
- Rot or Mold: Use a pet-safe solution to treat affected areas and prevent more damage.
Conclusion
By following the steps in this article, you can make a dog fence cheaply. This creates a safe spot for your pet to play outside. It also helps the environment by using recycled materials.
Building a pallet dog fence is good for your wallet and the planet. With some creativity and basic tools, you can make a fence that looks great and works well. You’ve learned how to pick materials, plan your design, and install it carefully.
Now, you’re ready to start making your pallet dog fence. You can do it all for under $50. So, get your materials, follow the steps, and enjoy making something fun and useful for your pet.